What really happened in the Koji Haneda case seventeen years ago?
How are Rum, Amanda Hughes, and Asaka connected to the two deaths?
The Koji Haneda case began seventeen years earlier at the Juke Hotel in the United States. It links a shogi champion’s death to the Black Organization, the woman now known as Rumi Wakasa, and the disappearance of Tsutomu Akai.
Rum directed the operation, but the two deaths at its center did not occur in the same way. Understanding who the Organization originally targeted—and why two people chose to protect Asaka—makes the sequence much clearer.
Spoiler warning: This article explains the Volume 104 revelations, Rum’s identity, Asaka’s identity, and later clues. Dialogue is paraphrased unless a literal code or name is being discussed.
The Truth About the Koji Haneda Case: The Essential Answer
The Organization’s original target was Amanda Hughes. She sent her bodyguard Asaka away, then took poison herself under the pressure of Rum’s operation. Koji Haneda hid Asaka and was subsequently given poison by Rum’s side.
Asaka survived. In the present story she is Rumi Wakasa, the assistant homeroom teacher at Teitan Elementary School. The case is therefore not only a historical explanation: one of its survivors is still acting against the man responsible.
What Happened at the Juke Hotel Seventeen Years Earlier?
The hotel was hosting a major chess tournament. Koji, a four-title shogi champion, had traveled to the United States to participate in chess, which he enjoyed alongside his professional game.
Amanda, a wealthy American admirer of Koji, was staying there with Asaka. Their time playing chess gives way to danger when Rum’s team infiltrates the hotel and neutralizes Amanda’s guards.
Amanda sends Asaka to Koji’s room. She dies after taking poison; Koji hides Asaka, confronts Rum’s group, and is poisoned as well. A peaceful gathering becomes the setting for two deaths and a survivor’s escape.
Rum Directed the Operation; His Present Identity Is Kanenori Wakita
Rum is the Black Organization’s second-in-command. He now operates as Kanenori Wakita at Beika Iroha Sushi, close to the Mouri Detective Agency.
Seventeen years earlier he still had both physical eyes. His exceptional visual memory was a major asset in identifying targets and dismantling their protection.
He approaches Amanda, then follows the search for the missing Asaka into Koji’s room. The apparently friendly sushi worker of the present is the operative who directed the violence behind this earlier case.
Amanda and Koji Did Not Die in the Same Way
Amanda takes the poison herself in an attempt to prevent the Organization from using Asaka against her. Koji is given poison by Rum’s side after hiding Asaka.
Amanda’s death remains a consequence of the Organization cornering her; describing her immediate action does not remove that responsibility. However, it would be inaccurate to say both victims were forcibly dosed in an identical manner.
Both deaths are connected by their decision to protect Asaka, but the specific actions leading to each death must remain distinct.
A Brief Overview of the Case

The simplest starting point is three people: Koji, Amanda, and Asaka. Amanda is the original target, Koji becomes involved by protecting Asaka, and Asaka survives to carry the consequences into the present.
Rum’s operation explains the threat. Kuroda’s intervention explains part of the escape, while Tsutomu’s later investigation connects the aftermath to the Akai family. Keeping those stages separate prevents everyone associated with the case from being placed at the hotel at the same time.
Who Are the Key People?
Koji Haneda is the shogi player killed after sheltering Asaka. Amanda Hughes dies in another room that same day. Asaka is Amanda’s bodyguard and a survivor, not the killer suggested by the early misleading interpretation of the evidence.
Rum directs the Organization’s operation. Hyoue Kuroda discovers the victims and tries to remove Asaka from danger. Tsutomu Akai investigates afterward at the Haneda family’s request, then disappears.
The later revelation resolves Rum’s involvement for the audience even though the case’s public status and all its remaining consequences are separate matters. The detailed flashback takes Rum’s role beyond the suspicion surrounding the case’s early presentation.
Which Manga Volume and Anime Episodes Cover the Case?
The mystery is introduced in fragments from Volume 89 onward. Volume 104 provides the detailed sequence connecting Amanda, Koji, Asaka, Rum, and Kuroda.
The corresponding television storyline is international episodes 1222–1225 (Japanese episodes 1164–1167), collected under The 17-Year-Old Truth in the episode guide used here.
Volume 104, Overall Files 1103–1109
Files 1103–1105 concern the present-day chess tournament and case. Files 1106–1109 move into the core events of seventeen years earlier as Kuroda and Wakasa recall the past.
The flashback explains why Amanda sent Asaka away, why Koji concealed her, how Rum confronted them, and how Kuroda’s accident followed.
Previously isolated clues become parts of one sequence. The important distinction is between the present case framing the recollection and the historical events themselves.
Japanese Episodes 1164–1167
The four-part adaptation aired in June 2025. The episode guide lists its parts as The 17-Year-Old Truth (The Bloody Knight), The 17-Year-Old Truth (The Perceptive Devil), The 17-Year-Old Truth (The Far-Sighted Bishop), and The 17-Year-Old Truth (The Queen’s Gambit). These are the established guide titles; they are not claimed here as independently verified official streaming titles.
The adaptation gives visual form to Amanda’s almost parental attachment to Asaka and Koji’s decision to protect her. The bishop-related installment is particularly important to the shogi piece Wakasa still carries.
An anime episode number in this range must not be confused with a manga File number, which refers to a different numbering system.
Koji Was a Four-Title Shogi Champion
Koji held four major shogi titles and also played chess well enough to enter an American tournament. Amanda was his admirer, and the two enjoyed playing together at the hotel.
He combines analytical composure with a gentler, joking manner around Asaka. When danger arrives, that ability to look ahead becomes part of his attempt to secure her escape.
His Japanese voice actor is Hiroki Yasumoto. The significance of the character lies not only in the clue left at his death, but in the choice he makes before it.
How the People in the Case Are Connected
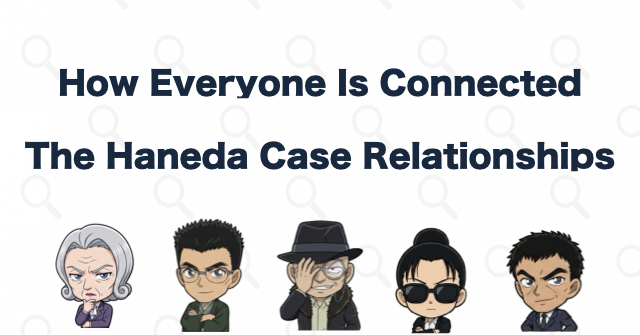
Koji, Amanda, Asaka, Rum, and Kuroda are directly involved in the hotel events. Tsutomu enters through the subsequent investigation, and Shukichi connects the Akai and Haneda families through adoption.
Their connections form a chain of consequences, not a single group assembled in one room.
Koji, Amanda, and Asaka
Amanda admires Koji as a shogi player and meets him through the chess tournament. Asaka works as her bodyguard, but their bond is more than employment: Amanda raised her after her father had also served Amanda.
Koji expresses attraction to Asaka and later acts to protect her. That does not establish that they were a dating couple or that her feelings were already the same as his.
Amanda and Koji share a final priority: preserving Asaka’s life, even when it costs their own.
Rum, Kuroda, and the Organization
Rum directs the attack. Kuroda is not one of his operatives; he discovers the aftermath and attempts a rescue.
When Asaka awakens and sees Kuroda near Koji’s body, she mistakes him for an enemy and attacks. He nevertheless recognizes that she should be treated as an endangered survivor whose account needs to be heard, rather than automatically as the killer.
The initial appearance of hostility is therefore misleading. The man she attacks is trying to get her away from the people pursuing her.
Tsutomu, the Akai Family, and the Haneda Family
Tsutomu investigates after the event at the Haneda family’s request; he is not placed at the hotel during the killings. His disappearance following that investigation helps motivate Shuichi’s later pursuit of the Organization through the FBI.
Tsutomu and Mary’s second son, Shukichi, joins the Haneda family after high school. Koji consequently becomes his elder brother through adoption.
One hotel’s violence reshapes more than the survivor’s life. It changes the direction of an entire family’s history.
The Events of Seventeen Years Earlier, in Order
Amanda first realizes that her protection is failing. She creates an escape route for Asaka, and Koji continues that effort in his own room.
Their decisions prevent Rum’s operation from eliminating every witness, even though neither lives to see the long-term consequence.
Amanda Detects the Danger and Sends Asaka Away
Unable to contact her other guards, Amanda recognizes that something is wrong. She also identifies the threat posed by Rum, whom she has encountered before.
She invents an errand involving a chess piece and sends Asaka to Koji’s room. If she explained the danger directly, her bodyguard would be likely to remain and fight.
The deception is protective rather than dismissive. Amanda uses an ordinary instruction to get the person she regards almost as a daughter out of immediate reach.
Amanda Takes Poison Before Asaka Can Be Used Against Her
Rum wants to exploit Amanda’s influence and connections. Amanda understands that compliance would leave Asaka vulnerable as leverage against her.
She takes the poison in Rum’s possession herself. It is an earlier version of APTX 4869, not necessarily a formulation with every property identical to the drug used in the present.
The immediate act differs from forced administration, but it occurs under the lethal pressure of the Organization’s operation. Her objective is to prevent Asaka from becoming a permanent bargaining tool.
Koji Renders Asaka Unconscious and Hides Her Behind a Bookshelf
Asaka wants to return to Amanda, but Koji understands that doing so would defeat Amanda’s attempt to protect her. He incapacitates Asaka and conceals her in a space behind the bookshelf.
She is not given a full explanation before losing consciousness. Koji then remains outside the hiding place to face the people searching for her.
He was not the operation’s original target, yet chooses to continue the escape plan rather than abandon the person entrusted to him.
Koji Confronts Rum and Is Killed
Rum’s group enters while looking for Asaka. Koji conceals her location and mentions Renya Karasuma, bringing the Organization’s boss into the conversation.
His knowledge, his encounter with Rum, and his suspected protection of Asaka make him someone the Organization wants silenced. Rum’s side gives him poison.
Before dying, Koji leaves a message using a hand mirror. He cannot save himself, but he attempts to preserve both Asaka’s hiding place and a clue that someone else can use against the Organization.
Kuroda Finds the Bodies and Attempts to Remove Asaka
Kuroda discovers Amanda’s body, then reaches Koji’s room and encounters the surviving Asaka. Her attack does not persuade him to hand her over without understanding the situation.
He attempts to take her out in a trunk used by the Organization, unaware that it contains a tracking device. During the escape, his car collides with a truck.
He suffers the injury to his right eye and subsequently spends roughly ten years unconscious. The intervention preserves a route out for Asaka but permanently changes his own life.
Why Was Koji Haneda Killed?
Koji was not initially selected as the Organization’s target. He becomes a threat to the operation by sheltering Asaka and demonstrating knowledge connected with Karasuma.
His death follows a deliberate decision to protect someone, not merely his presence at a chess tournament.
Amanda, Not Koji, Was the Original Target
Amanda’s wealth and extensive connections, including contacts associated with the FBI and CIA, make her valuable to the Organization. Its operation at the hotel centers on her.
Koji is there for chess. His contact with Amanda and Asaka brings him near the danger, but his choice to hide Asaka places him directly in its path.
The distinction matters to his characterization: he is not pursuing the Organization as part of a preexisting mission when the crisis begins.
He Protects Asaka and Mentions Karasuma
Rum’s team has reason to suspect that Koji knows where Asaka went. Koji also refers to the name connected with the Organization’s boss.
Together, those facts make him an unacceptable witness from their perspective. He has seen Rum, may be sheltering a survivor, and has reasoned toward a name the Organization needs concealed.
His protective action and deduction converge, leaving him exposed to an enemy prepared to kill for secrecy.
Poison Kills Him; He Does Not Survive by Shrinking
Koji appears on the drug’s victim list, and his body is found. His death is established; it is not a case of him surviving in a child’s body as Conan and Haibara do.
That outcome does not prove that the earlier formulation was incapable of producing any unusual effect in anyone. The story does not establish a universal “always fatal” specification for the seventeen-year-old drug.
The supported conclusion concerns Koji himself: he was poisoned and died. The precise history of the research is a separate question.
The Two Messages Left by Koji and Amanda
Koji and Amanda leave different clues. The mirror points toward Karasuma, while Amanda’s chess-related message directs attention to the dangerous eye of the operative at the scene.
The clues complement one another; they should not be merged into one message or assigned to the same author.
Koji’s Mirror Points to CARASUMA
The hand mirror bears the phrase PUT ON MASCARA. Letters removed from the inscription leave material that can be rearranged as CARASUMA, pointing to Renya Karasuma.
Conan and Akai initially consider the arrangement RUM ASACA. That reading encourages suspicion of Asaka. Yusaku’s reinterpretation treats the letters as one name instead of two.
The same surviving characters therefore change the scale of the investigation. What appeared to implicate the bodyguard instead points toward the Organization’s boss. The spelling in the code is preserved because its letters are the evidence.
Amanda Warns About Rum’s Eye
Amanda uses chess-related objects and lipstick to leave a warning. In the present, Conan interprets the clue after Kuroda brings it to him.
The clue combines the warning WATCH OUT with a visual detail directing attention toward the eye. The words convey the warning, while the eye-related detail identifies the danger; the two elements are not a single phrase reading “Watch out eye.”
Its intended significance is a warning about Rum’s eye and his ability to remember what he sees. Amanda knows from an earlier encounter how dangerous that ability can be.
One Message Identifies the Boss; the Other Warns of the Operative
Koji leaves the name associated with the person at the top. Amanda identifies a dangerous characteristic of the man carrying out the operation.
Together they connect the hotel events to the wider Organization rather than reducing them to an isolated killing by Rum alone.
The historical case thus reaches beyond the Rum identity arc. It also provides a route into the mystery of Karasuma.
What Does the Flashback Reveal About Rum’s Left Eye?
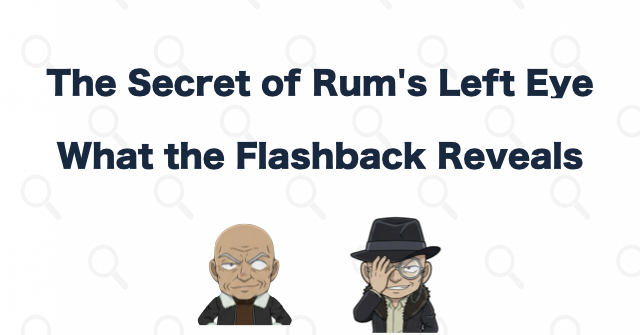
Rum’s exceptional memory is part of the operation’s machinery. Identifying faces, gestures, and recurring behavior lets him strip away protection before overt violence begins.
The story distinguishes the existence of both eyes from the persistence of the special ability in them.
His Left Eye Retains a Form of Photographic Memory
Rum describes the ability as a kind of photographic memory. It concerns retaining and comparing visual information rather than simply having unusually sharp eyesight.
Faces, clothing, positions, gestures, and habits can become lasting points of identification. Changing a hairstyle or outfit may not be enough if the remembered behavior remains recognizable.
The threat is delayed as well as immediate: being seen once can create information that he may use much later.
He Identifies Amanda’s Guards from Surveillance Footage
After his team takes control of the hotel’s surveillance, Rum covers his right eye and examines the images with his left. He identifies guards Amanda has employed before and directs his men toward them.
The guards other than Asaka are neutralized, leaving Amanda increasingly isolated. A large protective staff becomes a collection of familiar targets for someone with his memory.
The operation illustrates the ability concretely: remembered faces are converted into instructions that dismantle security.
Remembered Habits Help Him Gather Leverage
Rum can connect a disguised person with a known identity through recurring gestures and habits. Amanda recognizes the usefulness of that ability for collecting compromising information about influential people.
The Organization can then use those vulnerabilities to exert control. Rum may describe the arrangement differently, but the pressure rests on private knowledge.
His danger is therefore not limited to assassination. Observation and memory can become tools for controlling other people’s choices and widening the Organization’s influence.
The Ability Once Existed in Both Eyes, but Only the Left Retained It Seventeen Years Ago
Rum is described as having possessed the ability in both eyes when younger. At the hotel he still physically has both eyes, but only the left retains the special memory function.
He later loses that eye and now uses a prosthesis. During a Kaito Kid case, his thoughts about how useful the lost eye would have been connect the visible injury with a missing operational advantage: comparing a disguised person’s habits with those he remembers.
Interest in restoring the remaining eye’s earlier condition through the drug is a possible implication, not a confirmed successful treatment. Physical loss, age-related decline, and speculative restoration must remain separate stages.
What Was the Job Rum “Botched”?
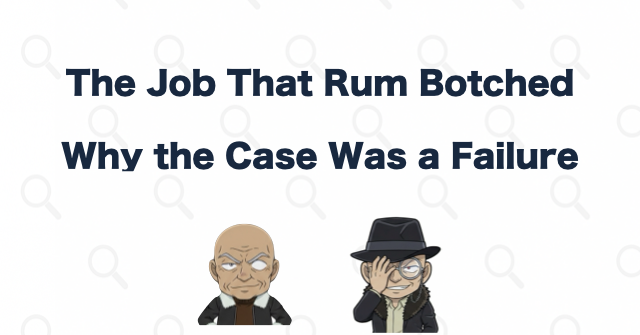
Gin’s description establishes that the Organization regards the old case as a failure associated with Rum. The complete list of what that judgment includes has not been expressly itemized.
Asaka’s survival is a clear failure of the effort to silence witnesses; other lasting traces may also contribute.
Gin’s Remark Connects Rum with the Case
Gin refers dismissively to the killing Rum mishandled seventeen years earlier. The statement linked Rum to the old case before the full flashback appeared.
It establishes responsibility and the Organization’s negative assessment. It does not, by itself, explain which precise action failed or disclose an entire internal review of the operation.
Volume 104 gives the earlier remark context without necessarily exhausting every implication of it.
Asaka’s Survival Is a Definite Unfinished Threat
Asaka survives and is still alive as Wakasa. She retains knowledge of the operation and hostility toward Rum, while information about the case continues circulating online.
She is not simply an old witness who disappeared from the story. Her present actions keep the consequences of the operation active.
From Rum’s perspective, the person he failed to eliminate remains capable of bringing the past back into his present.
The Full Meaning of the Failure Is Not Explicitly Listed
Possible additional failures include Koji’s surviving message, the unnecessary expansion of the incident to another victim, Kuroda’s discovery of the scene, and the persistence of information afterward.
Those are reasonable consequences to discuss, but the story has not labeled every one of them as a specific item in Gin’s criticism or the boss’s response.
The operation’s visible failures do not reveal exactly how the Organization evaluated each of them.
Koji’s Relationship with Asaka, Now Rumi Wakasa
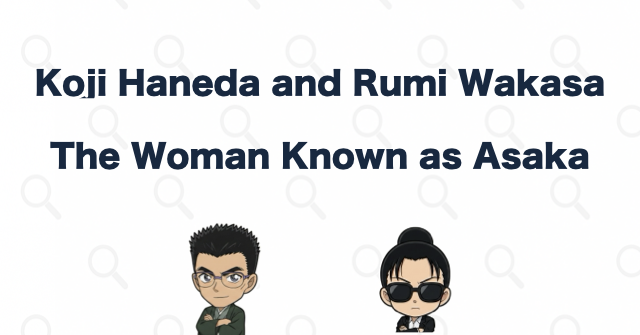
Koji and Asaka are not established as a dating couple. He expresses attraction and then protects her at the cost of his life; her later attachment to the shogi piece carries the weight of that rescue.
Their brief connection should not be inflated into a confirmed romantic history that the story does not show.
Koji Expresses Interest in Asaka
When Amanda comments on Asaka’s reserved manner, Koji makes clear that he finds her attractive. His interest is not merely an inference from the later rescue.
The story does not establish an existing relationship or an equally explicit declaration from Asaka. It may be closer to one-sided interest at that point.
His light conversational tone acquires a different weight after he refuses to abandon her. The later action deepens the significance of the earlier remark without creating an unshown courtship.
He Entrusts Her with His Bishop Piece
Before concealing Asaka, Koji gives her the shogi bishop he regards as a good-luck charm. His accompanying shogi proverb evokes the strength of a bishop positioned at a distance, watching for a useful counterattack.
The piece serves both as a protective gesture and an image of survival followed by an opportunity to strike back.
Wakasa’s continued possession of it makes the past tangible. It is not merely an abstract clue about the case; it is an object personally entrusted to her.
Why Wakasa Thinks of Him as a Fool
Wakasa’s harsh-sounding thoughts about Koji can be read as grief and anger at his sacrifice rather than contempt for him. He chose to remain in danger and left her alive with the consequences.
Gratitude does not fully describe that emotional burden. She may also feel anger that he died for her or that she could not prevent it.
Those motives are interpretation, not a complete stated account of her inner life. The repeated words nevertheless carry an emotional force that goes beyond a simple insult.
Wakasa Is Connected with the Online Case Information
Wakasa is revealed as the person behind the recurring online information about the Haneda case. Keeping it visible prevents the incident from disappearing and allows attention to be paid to people responding to it.
The investigation around Conan and Professor Agasa is connected with that thread. It does not establish the website as the sole reason she takes a teaching position at Teitan.
Interest in Conan, Haibara, and Rum may overlap. A single demonstrated method should not become an invented exclusive motive for every later choice.
Kuroda’s Role in the Case
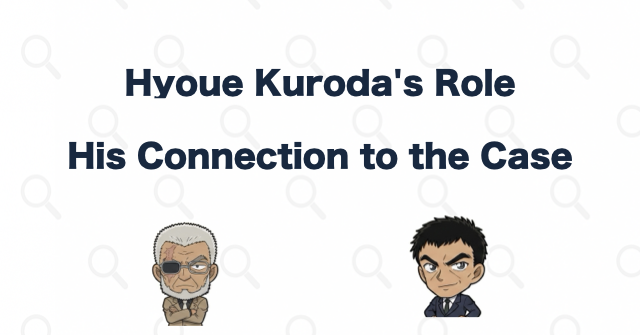
Kuroda is a rescuer, not the killer. His discovery of the bodies and decision to remove Asaka place him in danger and lead to the injuries behind his present appearance.
That history reverses the early suspicion encouraged by his imposing face and prosthetic eye.
Watching Chess and Planning to Meet Amanda
Kuroda is at the hotel ostensibly to watch the chess tournament with a friend while on leave. At the time, he serves in the National Police Agency’s Security Planning Division, and his superior has assigned him to contact Amanda.
The precise subject of that meeting is not fully explained. Amanda’s extensive contacts make the information she could provide potentially valuable, but the assignment’s full agenda remains undisclosed.
His presence is therefore connected with a public security assignment, even though the full purpose of the intended meeting remains a mystery.
He Treats Asaka as Someone Who Needs Protection
Asaka attacks after mistaking him for a member of the group responsible for the deaths. Kuroda does not simply classify her as a murderer because of that response.
He judges that her account needs to be heard and attempts to get her away from the hotel. Concern that the enemy may have influence beyond the immediate scene helps explain why a direct handover is not treated as straightforward.
To Asaka he initially appears to be another threat, but his action continues the rescue begun by Amanda and Koji.
The Escape Accident Injures His Right Eye
The trunk used to transport Asaka contains a tracker. The ensuing escape ends in a collision with a truck, after which Kuroda loses the use of his right eye and spends roughly ten years unconscious.
His later white hair and changed appearance belong to that traumatic history. They are not proof of an identity swap or membership in the Organization.
The feature that once made him resemble a candidate for Rum instead marks the cost of helping Rum’s intended victim.
What Happens to Tsutomu and the Akai Family Afterward?
The Haneda family asks Tsutomu to investigate. His pursuit brings him into contact with dangerous opponents and apparently with Asaka, before he disappears.
These events belong to the aftermath; they must not be inserted into the hotel sequence without evidence.
Tsutomu Investigates at the Haneda Family’s Request
Shuichi identifies his father, not himself, as the Akai family member directly involved in investigating the seventeen-year-old case. Tsutomu knew the Haneda family and accepted their request to look into Koji’s death.
He follows the remaining information and people after the incident. That work draws the family into the conflict that Shuichi later continues.
It is a causal connection across generations, not a claim that Shuichi witnessed the original murder.
He Warns His Family to Leave for Japan
During the inquiry, Tsutomu warns that he has made exceptionally dangerous enemies and tells his family to take refuge in Japan.
The Organization is the strongly indicated threat in context, but the warning does not provide his family with a complete account of the investigation.
His effort to keep danger away from them leaves distance and uncertainty. The protective decision becomes part of the long absence that shapes his children’s lives.
Tsutomu Disappears During the Investigation
Mary remains in contact with him for part of the inquiry and asks about identifying Koji’s killer. He subsequently vanishes, and no body or confirmed death is established in the chapters covered here.
The later person who approaches Mary as Tsutomu is Vermouth. That imposture does not answer where the real man is or whether he is alive.
His status therefore remains unresolved rather than “confirmed dead” or “confirmed secretly active.”
A Recollection Shows Him Protecting Asaka
Wakasa recalls Tsutomu ordering her back while he prepares to face a dangerous opponent. The scene supports that he encountered and protected her after the hotel events.
The exact time, place, and identity of the enemy he describes as monstrous remain undisclosed here. Rum is a possibility, not a confirmed identification from the wording alone.
The emotional parallel with Koji’s sacrifice is powerful, but the outcome for Tsutomu must not be assumed to be the same as Koji’s confirmed death.
Shukichi Joins the Haneda Family Through Adoption
Shukichi is Tsutomu and Mary’s second son, Shuichi’s younger brother, and Masumi’s older brother. After graduating from high school he joins the Haneda family, making Koji his elder brother through adoption.
Shukichi joins the Haneda family to carry on Koji’s dream as a shogi player. His adoption gives that inherited ambition a family connection as well as a place in his professional career.
The adoption links a family that lost a son with another affected by the investigation into his death.
What Remains Unsolved?
Volume 104 explains much of the hotel sequence, but not every later consequence. Rum’s lost eye, Tsutomu’s status, and Kuroda’s original purpose remain substantial unresolved threads.
They should remain visible as unanswered questions rather than be silently completed by a coherent-sounding theory.
How Rum Lost His Left Eye
Rum still has both physical eyes during the hotel events and uses a prosthesis in the present. The loss therefore occurs later.
The theory that Tsutomu injured him can fit the broad chronology, particularly alongside the recollection of Tsutomu protecting Asaka. However, the opponent is not explicitly identified as Rum, and the injury itself is not shown in the material covered here.
Chronological compatibility makes the theory possible, not confirmed.
Whether Tsutomu Is Alive
Tsutomu disappears after pursuing the case. The absence of a body prevents a confirmed death claim; his absence from his family’s life also does not establish that he is safely alive.
If he survives, the reason for remaining apart needs explanation. If he died, the circumstances remain to be revealed.
The answer is a major part of the case’s continuing aftermath, not something resolved by Vermouth’s impersonation.
What Kuroda Intended to Discuss with Amanda
Kuroda has a planned meeting but does not disclose its full agenda. Amanda’s connections invite speculation about intelligence or security matters.
Kuroda’s assignment and the intended conversation would be needed to state that purpose confidently. Until then, the article preserves the difference between a meeting being indicated and its contents being known.
The Full Extent of Rum’s Failure
Asaka survives, Koji’s message persists, and Kuroda sees the aftermath. Those are lasting consequences the operation failed to prevent.
Which specific consequences Gin’s remark and any judgment by the boss encompass is not fully stated. An account of the aftermath should not masquerade as a revealed internal list of Rum’s mistakes.
The failure is real; its complete official definition within the Organization is still incomplete.
Conclusion

The Koji Haneda case begins with an operation against Amanda and becomes a chain of attempts to protect Asaka. Amanda sends her away, Koji hides her, and Kuroda tries to remove her from the hotel.
Amanda and Koji die by different immediate routes, while Asaka survives as Rumi Wakasa. The bishop she carries is both a connection to the evidence and a personal keepsake of Koji’s decision.
Rum may regard the event as an old failed operation. For Wakasa it is the day she lost two people who protected her. The hotel’s sequence is now much clearer, but its consequences remain active as she and Rum continue moving through the present story.





Comments