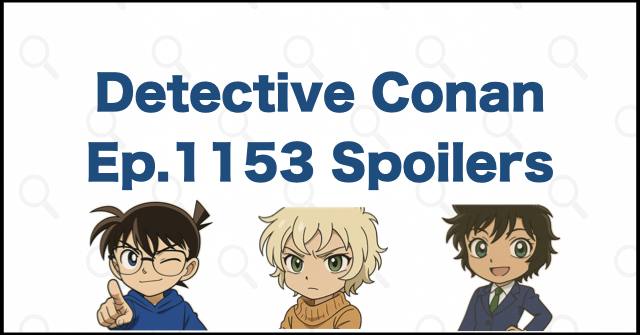
Spoiler warning: This article reveals the identity shown in the photo, the culprit, and RUM’s pursuit of Mary.
Kyosuke Domoto is the killer, and the newspaper photograph exposes Mary beside Masumi to RUM. Who kept the image out of the press before its publication remains unconfirmed.
The Mystery Photo arc continues from File 1151. In File 1152, each suspect revealed what the photo might show.
File 1153 is the resolution chapter—a must-read where the case is solved and the true identity of the photo finally comes to light.
Spoiler warning: major plot details ahead.
Detective Conan File 1153 “The Truth In the Photo” – Spoilers
The case of slain reporter Tomoya Ogasawara reaches its conclusion. With three suspects on the board, Conan and Masumi Sera zero in on the killer:
- Rina Nomura – gravure idol and Ogasawara’s lover (affair)
- MP Shuho Kondo – member of the House of Representatives
- Actor Kyosuke Domoto
1153 Spoiler ① – Decoding the Dying Message
Sera explains the dying message. A calculator near the body and a blood mark form a number-to-letter clue. The victim had also gripped a chair wheel (a “tire”). Numbers and letters used in motorcycle-tire speed markings give Sera a way to connect the wheel with the calculator. The result points to the hotel clue below.
The answer is OBAKE. In hotel jargon, “obake” means a guest with no reservation—pointing straight to the man who fought with the front desk about not being on the list: Kyosuke Domoto.
1153 Spoiler ② – How the Trick Worked
Domoto wedged a business card in the door latch so he could unlock it from outside. He then slipped into the bathroom and sprayed a foul, “gassy” perfume to make Ogasawara avoid showering. When Ogasawara stepped out, Domoto tried to delete data from his phone; they ran into each other as Ogasawara returned, argued, and Domoto killed him.
Smoking gun: Domoto was found in possession of Ogasawara’s smartphone.
1153 Spoiler ③ – What the Photo Actually Showed
Domoto’s motive: the photo captured him having an affair with an actress during the hotel bombing incident. As for MP Kondo, he appeared in the same shot with members of the criminal group Deisankai, including Kiriko Busujima—a political death sentence if published.
Kondo had planned to use a GPS tag to lure Deisankai underlings to Ogasawara for silencing. When the GPS signal stopped moving, the plan broke down and Kondo hurried back to the room—explaining his presence at the scene.
1153 Spoiler ④ – Morning Headlines Flip the Board
The next day, Ogasawara’s explosive photo hits the front page—he appears to have arranged publication if anything happened to him. Kondo’s underworld ties are exposed, ending his career.
Conan zooms in on the image and freezes: Masumi Sera and a de-aged Mary Sera are clearly visible. He finally understands why Sera was desperate to find the data—and now wonders, who had the power to suppress this shot until now?
1153 Spoiler ⑤ – RUM Makes His Move
Elsewhere, RUM smiles darkly at the printed photo. “I’ve finally found you… Mary Akai.” (unofficial translation) The image suggests to him that Mary appears de-aged.
RUM muses: “For some, the same poison stops time… for others, it reverses it. What I must obtain… are the conditions.” (unofficial translation) His focus on the “conditions” suggests a pursuit of the truth behind APTX 4869, raising the stakes for Mary.
Detective Conan File 1153 “The Truth In the Photo” – Review & Theories
The photo at the heart of this case could have been fatal for Masumi Sera—yet the story swerved at the last moment when it landed on a newspaper front page. Below, we unpack the key implications tied to that image.
1153 Review & Theory ① – Could the Elderly Man Have Held Back the Photo?
An elderly man with a respirator remains a possible explanation for why the photo stayed out of the press. His driver triggered the fire alarm, guiding Mary Sera outside; he then personally witnessed Mary in her de-aged state. File 1153 does not establish who applied pressure to halt publication.
His apparent concern for Mary supports a protective reading, but it does not establish his affiliation, motive, or influence. Those remain questions for later material.
1153 Review & Theory ② – A Crisis: RUM Has Found Mary
The published image captured Mary Sera in child form—exactly what Sera wanted to prevent. The fallout is immediate: The photograph gives RUM a lead on Mary’s survival and proximity to Masumi. Mary has previously been targeted with APTX 4869 by Vermouth; staying close to a visible high-schooler like Masumi may expose Mary’s location again. The story formally enters an emergency phase where Mary’s life is in danger, and every move by Masumi and Mary will matter.
1153 Review & Theory ③ – RUM Closes in on the APTX 4869 Secret
RUM’s reaction suggests that he connects Mary’s de-aged appearance with APTX 4869. Her survival contrasts with Koji Haneda and Amanda Hughes, who died after exposure. His words suggest an interest in the mechanism: why does the same drug kill some people but de-age others? RUM may pivot toward uncovering the conditions behind APTX 4869’s divergent outcomes. We’ll dive deeper into those hypotheses in a separate analysis.
1153 Review & Theory ④ – What the Photo May Mean for Tsutomu and the Movie Thread
RUM’s reaction also brings Tsutomu Akai back into the long-term mystery. A possible connection to his work with the Secret Intelligence Service (MI6) remains a theory here. The chapter does not establish whether Tsutomu caused RUM’s eye injury or what happened to him.
At the close of File 1153, a later return to Chihaya and the police characters seemed possible. A connection with the announced 2026 film is also a possibility, rather than a confirmed direction for the next manga chapter.
Further reading (contains spoilers): Mary Sera, Conan, and the antidote and Rum's identity reveal.

Comments